Design for Additive Manufacturing:
Best Practices for Superior 3D Prints
")
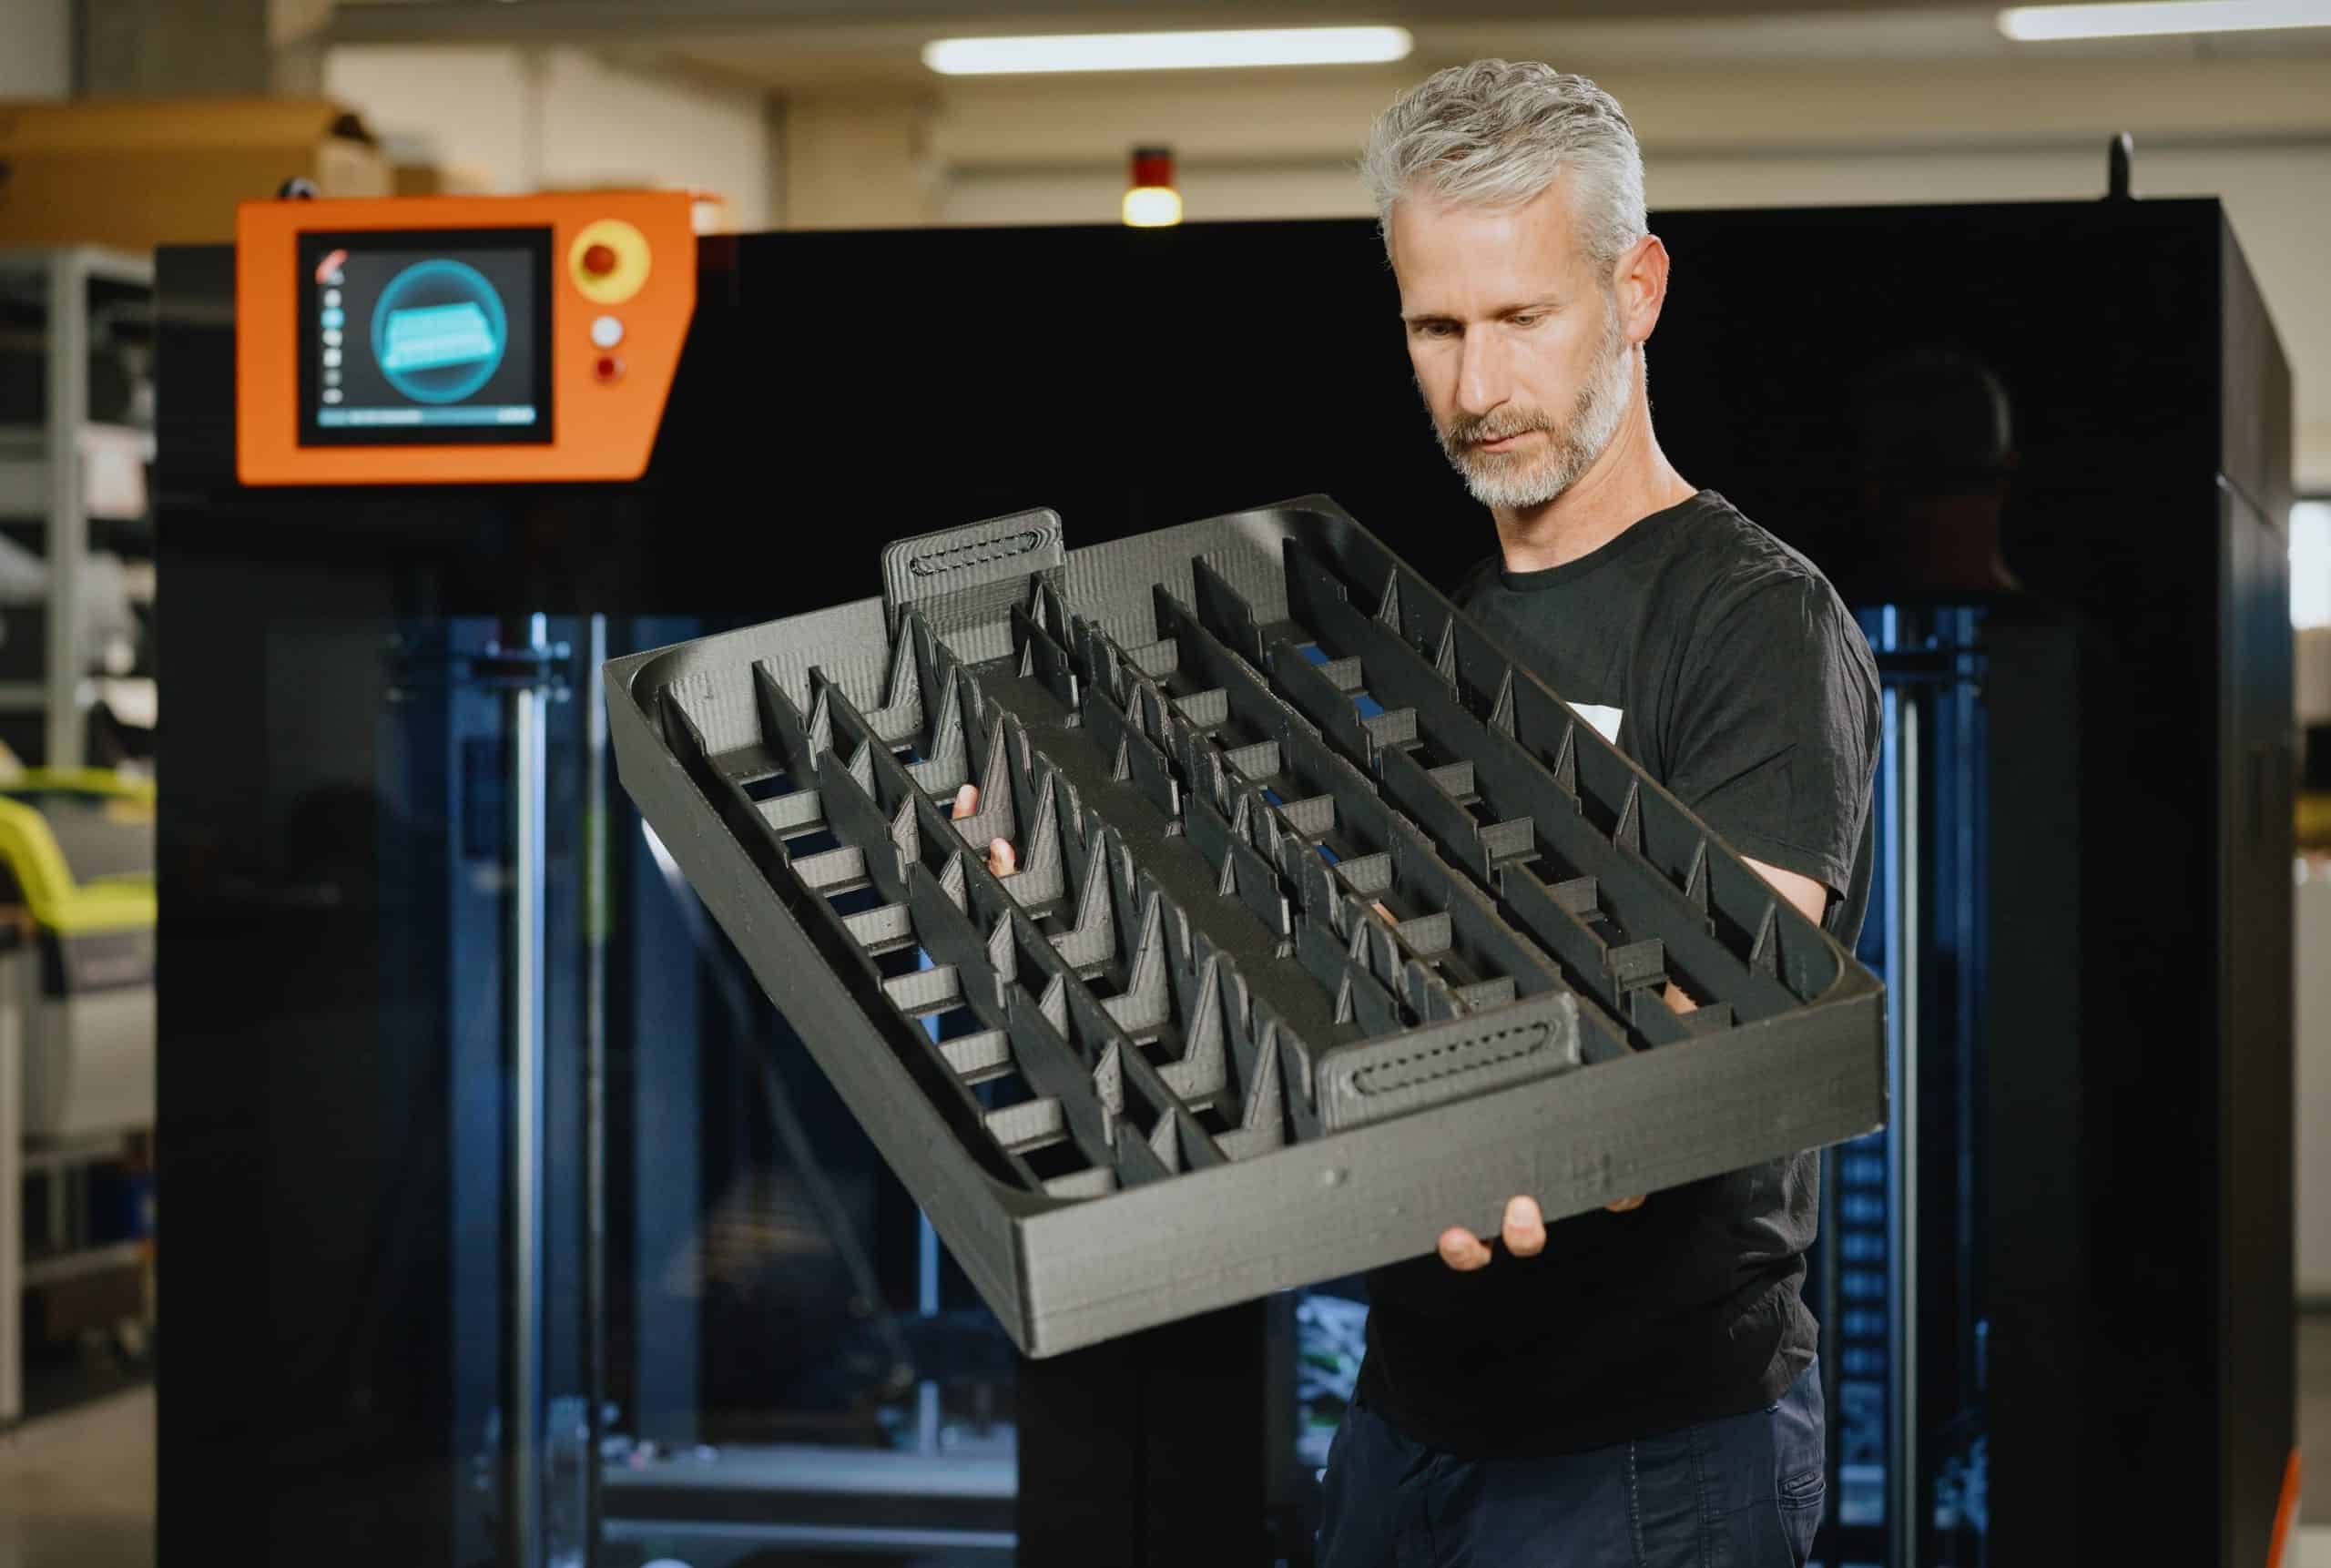
The possibilities for designing custom, innovative solutions using 3D printing are endless. While this is undoubtedly true for 3D printing hobbyists who want to create and optimize DIY projects, the advantages to Additive Manufacturing (AM) grow exponentially at an industrial scale, especially when you own a large-format BigRep printer.
Aside from freedom of design, 3D printers offer the added benefits of low-cost customization, agile iteration, faster time-to-market, reduced material waste, and a way to avoid complicated logistics and supply chains. However, not all designs are suited for Additive Manufacturing. Having the right knowledge is crucial to get the most out of your printer, especially regarding the earliest design and conceptualization stages. This is where Design for Additive Manufacturing (DfAM) can make or break the success of your project.
What is Design for Additive Manufacturing?
Additive Manufacturing (AM) is the process of creating an object by building it up one layer at a time. It is the opposite of subtractive manufacturing, where an object is produced by cutting away at a solid block of material until the final product is complete, such as CNC machining. While the terms are often used interchangeably, the most common form of Additive Manufacturing is 3D printing. DfAM is a method of designing parts specifically for Additive Manufacturing, which have unique requirements different from other common manufacturing processes such as injection molding or casting. The critical difference between DfAM and traditional design is that DfAM principles guide designers to take full advantage of the unique capabilities of 3D printing while avoiding some of its limitations with smart solutions.
This guide will explain some factors that make a design well-suited for 3D printing, plus it will introduce DfAM principles so you can maximize your 3D printing results.

Why DfAM Matters
Understanding DfAM is essential to ensure successful, repeatable, and scalable results that maximize 3D printing capabilities. What will you get from following DfAM guidelines?
- Reduced material and part costs: By implementing DfAM principles, unnecessary supports are avoided, reducing materials and lowering the cost to print. By using generative design software and AI, parts can be designed to minimize material usage while easily still meeting all of the necessary part requirements.
- Faster print times: Large-scale 3D prints may run for days or even weeks! However, when components are optimized for Additive Manufacturing, you can implement the most effective printing plan, ensuring the shortest print time that is possible.
- Increased scalability: By designing with DfAM principles, designs can be printed on various printers and scaled up or down without requiring significant adjustment. 3D printers can also produce sequential batches of prints or, in some cases, parallel prints that drastically speed up the time required to produce each part.
- Improved part strength: With Design for Additive Manufacturing principles, you can increase the strength of your 3D print, plus you can alter factors like part weight, flexibility, and more. CAD software with generative design functions uses algorithms to produce geometries that meet strength and performance requirements.
")
DfAM Best Practices
Design for Additive Manufacturing principles result in many overall benefits, but some specific design choices will be influenced by the type of 3D printing technology used. However, DfAM best practices will help you reduce material use and printing time, consolidate parts, and optimize topology and performance, no matter what 3D printing technology is implemented.
1. DfAM Depends on Your Specific 3D Printer
Before you start designing for 3D printing, you must understand the different types of processes available. The most popular 3D printing processes include FFF (also commonly referred to as the trademarked term, FDM), SLA, and SLS.
- FFF (fused filament fabrication) 3D printing consists of layers of melted plastic deposited onto a build platform. The plastic, in the form of a spooled filament, is fed through a heated nozzle that softens the material and extrudes it in a thin stream. The printer then lays down the melted plastic according to the design specifications of the printed model. Once each layer is complete, in the case of large-format FFF 3D printers, the extruder moves up in the Z axis exactly one layer height and another layer is deposited on top. In the case of some smaller desktop printers, the build platform lowers by the amount of one layer height to print the next layer. This process continues until the model is complete. Desktop FFF 3D printers are relatively simple and inexpensive, making them one of the most popular types of 3D printers among hobbyists and home users. However, large-format and specialized FFF machines can produce high-quality results, making them a viable option for professional and industrial applications. Any FFF 3D printer will require support structures for parts with overhang angles and bridging distances beyond limits. Depending on the model of FFF 3D printer, minimum wall thickness, layer heights, and other settings will vary. FFF 3D printers can print with a variety of materials, but virtually all filaments are some type of polymer which may also include fiber, metal, wood, or other additives. Some FFF printers can use water-soluble materials for printing support structures, which can then be dissolved in water for easy removal.
- SLA (stereolithography) uses ultraviolet (UV) light to cure and solidify photosensitive resin layers one at a time. As each layer is printed, the vat of resin also containing the print in progress lowers by one layer thickness. SLA prints may require some support structures, which are slightly different from FFF supports and are not available in water-soluble materials. SLA prints typically require cleaning after printing to remove any residual uncured resin otherwise, the print would be sticky and harmful to human skin.
- SLS (selective laser sintering) uses a laser to fuse powder materials, layer by layer, to create a 3D object. After each layer is printed, the powder bed is lowered by one layer thickness so another layer can be sintered on top. SLS prints do not require support structures because the print is surrounded by unsintered powder during the printing process. Finished SLS prints typically require cleaning, sometimes with specialized machines, to remove loose powder from the 3D printed part.

2. Reduce Material Usage and Printing Time
When designing a 3D model for Additive Manufacturing, it is crucial to consider the amount of material required and the time it will take to produce the finished product. Reducing material usage can reduce overall production costs and speed up the manufacturing process. You can minimize material by:
- Reducing the surface details in the model: Most 3D printing software has specific tools for reducing the surface details in the 3D model.
- Tweak the slicer settings: You can reduce the infill percentage, the number of walls, and more.
- Reorient the part: Reduce printing time, material usage, and support requirements with optimized part orientation.
3. Part Consolidation
One benefit to 3D printing is that parts that would traditionally need to be produced separately and later assembled may be 3D printed as a single, consolidated part. By doing this you can reduce printing time, increase production speed, reduce assembly time, and enhance part strength. As an added bonus, part consolidation may only be possible with 3D-printed parts, and by utilizing DfAM guidelines you may be maximizing the benefits of Additive Manufacturing. Part consolidation benefits include:
- Reducing the overall number of parts that need to be manufactured as multiple parts are combined together
- Reducing the amount of time needed to manufacture each individual part
- Reducing the amount of waste material generated during the manufacturing process
- Improving the mechanical properties of the final part by reducing internal stresses

4. Topology Optimization
Topology optimization principles aim to use the minimum amount of material that can meet given performance requirements while minimizing the weight of the component. First, you must specify the mechanical performance requirements (such as stiffness or strength) and design constraints (such as maximum allowable stress or displacement). Some CAD software can simulate how your part will respond under different loads. Based on the results of the analysis, you can then automatically adjust various design parameters until an optimal solution is found.
Topology optimization can improve a component's strength, stiffness, or weight as well as reduce manufacturing costs. It is often used with finite element analysis (FEA) to assess the effects of design changes on the component's performance. The results can then be used to create a new design that is more efficient and effective.

Design for Additive Manufacturing Guidelines
Like any other manufacturing process, there are best practices to produce quality 3D-printed parts.
1. Minimal Feature Size
Minimal feature size refers to an object’s minimum width or height that a 3D printer can accurately print. Sharp corners, holes, protruding text, and cutouts are the types of features where a minimum size can be critical for success. No matter on which axis the feature is oriented, it is usually constrained by the 3D printing technology used, as well as the specific hardware (e.g. nozzle size) or machine accuracy.
If your 3D-printed part requires holes, the minimum diameter will be dependent on different factors depending on the 3D printing technology. With SLS, for example, the holes must typically have a diameter over 1.5 mm to prevent powder from getting stuck in the holes. With FFF 3D printing, the minimum hole diameter is mainly dependent on nozzle size and layer height.
One DfAM recommendation is that all sharp corners should be chamfered or filleted to reduce stress. Applying chamfer and rounding the sharp edges ensures that shrinking forces concentrating on one specific point in the design are dispersed.

2. Wall Thickness and Layer Height
Wall thickness refers to the thickness of the printed object's walls, which are made of perimeters that are sometimes called the wall line count. The absolute minimum wall thickness is a single extruded line (a wall line count of 1) that is dependent on nozzle size: it must not be smaller than the nozzle diameter and usually slightly larger than the nozzle diameter, typically by a factor of 1.2. Additional wall lines such as inner walls, as well as infill, may be printed thinner than the nozzle diameter but is typically a minimum of 60% of the nozzle diameter.
A secondary factor determining minimum wall thickness is the overall geometry and intended use of the 3D print. If it is a functional object subject to stress or force, it is important to use thicker walls with a higher wall line count. If the object is a prototype for design iterations or fit checks, then thinner walls with fewer lines may suffice. The thicker the walls, the longer it will take to print the object and the overall part weight will increase.
Layer height, which is the thickness of each layer measured in the Z axis, will also factor into your DfAM choices. Although layer height settings are determined during the slicing, your design can be informed by which settings you plan to use. For example, a minimum feature size is dependent on layer height, so you should avoid designing features that your 3D printer cannot produce.
Layer height is dependent on the nozzle diameter: the height must be less than the nozzle diameter, typically a factor ranging from 0.3 to 0.6. The higher the layer height, the faster the print and the rougher the appearance of the layer structure on the surface. Part strength is somewhat impacted by interlayer bonding and the strength is slightly increased with higher layer heights. Typically, lower layer heights are used for finer, more precise prints with smoother surfaces, while higher layer heights are beneficial for faster printing when surface smoothness is not important or can be managed with post-processing.

3. Support Structures
While not technically part of the design process, support structures may be avoided by following DfAM principles, thereby reducing printing time and material usage, and improving surface quality.

Support structures are temporary structures that help to reinforce 3D objects, prevent them from collapsing during the printing process, and improve their overall strength and durability. 3D models with overhangs or elements with a small contact area with the build plate require support structures during 3D printing. Parts with delicate features or low-density areas may need support structures to prevent them from being damaged during 3D printing. However, each 3D printer and material has its own threshold for requiring supports; a rule of thumb is that parts with a vertical angle of 50 degrees or less don't require it.
Support structures are designed to be removed after the printing process. Breakable supports can be printed with the same material as the print and are manually removed when the print is completed. Another solution are supports, printed in a water-soluble material, that can be dissolved after printing. These are usually easier to remove and result in better surface quality. By following DfAM guidelines for overhangs and bridging (as noted below), you can reduce or entirely avoid the need to print support structures.
4. Overhangs
An overhang is any geometrical shape extending beyond the previous layer without any support structure. If an overhang is too steep, typically over 50°, it will sag or collapse without using a support structure.
When designing for Additive Manufacturing, you can adjust these angles to keep within maximum overhang angles, thereby avoiding overhangs that require support. The benefit of this is threefold: the printed surface will look better, the print will be faster, and it will require less material usage. With the BigRep BLADE slicer, the support structures can be created automatically based on material and machine-specific profiles. To experiment with higher maximum overhang angles, you can change this setting and reduce the automatically generated supports. The choice of material will also affect the maximum overhang angle achievable without support. If your project allows, you can choose a material that tolerates higher overhang angles to avoid printed supports.

5. Bridging
Bridging occurs when material is printed in mid-air spanning two or more otherwise disconnected segments without a printed layer below. To successfully bridge, the material must be able to keep its weight as well as the weight of the model itself. The maximum length of a bridge will depend on the material and the 3D printer. Beyond that limit, the bridge will sag unless support structures are printed below. By choosing a material with better bridging properties, you may be able to avoid printed supports without altering your design.
As seen in the image below, the quality of a bridge degrades the longer it is. In other words, past a certain (material, machine, and geometry dependent) threshold, the bridge will sag. The image below shows a test print demonstrating various bridge lengths printed with a BigRep ONE using PLA filament. Here we see that the bridge quality begins to suffer when longer than 50mm. Keep in mind that this test print is a simplification of a real-world 3D printing application, so your 3D print will likely require shorter bridges or support structures when compared to this test print.


6. Orientation
Part orientation is a setting determined during slicing, but your part design can be influenced and improved with this setting in mind during the design stage. By changing the orientation of the part within the printer's build volume, you can increase part strength, reduce printing time, improve surface quality, and avoid 3D-printed support structures. For stronger parts, the print should be oriented so that the printed layers are perpendicular to the direction of the force that will be applied to the part. This is because the inter-layer bond, where each layer touches the next, is the weakest part of the print. By orienting the layers perpendicular to the forces the printed part must withstand, it will be more resistant to breaking.
Part orientation can affect the overall print time by reducing travel moves (when the print head moves the extruder to a new location without printing) and by reducing the need for printed supports.
The surface quality is negatively affected by part orientation in two ways: support structures and the staircase effect. Support structures can impact the surface quality of a 3D print which may appear rougher, more irregular, and may be damaged during the process of support removal. The staircase effect occurs when the ridges created by the printed layers are more pronounced on a 3D print, as seen on the image to the right. This can be reduced in a few ways to make the print surface appear smoother. First, the layer height can be reduced, but this will increase printing time. Secondly, the part can be oriented so that the layers are built up perpendicular to the surface of the 3D print. If it is important that a particular surface is smoother, the print should be oriented so that surface is as vertical (in relation to the print bed) as possible.

7. Tolerances
In Additive Manufacturing, tolerance measures how much deviation is acceptable or expected from the original 3D model. It is, in other words, how closely the 3D print measures up to the digital model. It is essential to consider tolerance when designing parts for 3D printing, as the build process can introduce inaccuracies.
Support structures can affect tolerance if they leave an overly rough or distorted print surface after the supports have been removed. Understanding tolerances is essential because they determine how well a part will fit and function as intended. For example, a loose tolerance may cause the 3D-printed part to be loose and wobble if fitted within another structure while a tight tolerance may cause a part to be difficult to assemble or create excessive wear.
The achievable tolerances of a 3D print are dependent on the accuracy of the 3D printer itself, its components, and the material used. Accurate tolerances can be negatively impacted by the 3D printer when it is not properly calibrated or vibrates too much during printing. Tolerances are also determined by nozzle diameter and layer height. A 0.6 mm nozzle will be able to achieve smaller tolerances than a 2 mm nozzle. Higher layer heights will give a rougher surface resolution, which also affects the achievable tolerance of the 3D-printed part.

8. Infill
Infill is a 3D-printed interior structure, typically a lattice pattern, that fills the interior cavity of a 3D print. The type and density of infill are determined in the slicing, but it can be useful to know what infill is needed when initially designing your part.
Infill serves two functions: it increases the strength of the part and is necessary to support the top layers of certain geometries. The infill can be a variety of patterns like a grid, triangle, or gyroid, and its density is determined by the slicing settings ranging from 0-100% of empty versus solid space. With 0% infill, the part will be lighter and print faster, but the part will be weaker. It is virtually never necessary to print with 100% infill, as the increased part-strengthening effect of infill is typically negligible above a certain percentage. The second function of infill, to support top layers, is only a factor depending on the part geometry. If the top area is smaller than the distance that can be achieved by bridging, then no infill may be required unless part strength is a factor. In practice, most 3D prints require infill to support the top layers and the infill density required for adequate top layers depends on the number of top layers, the machine's capabilities, and the material used. If a 3D print only has one top layer, the space between the printed infill walls may sag, but with additional layers, the final top layer may compensate and appear as intended.
The correct settings depend on your project requirements. For example, if you are 3D printing an object that does not need to be strong, you can use a lower infill setting to save time. When designing for Additive Manufacturing, the infill should be as strong as possible while using the least amount of material. This helps to reduce the weight of the object and the overall cost of printing.
If your design constraints allow, you can change the geometry of your part to minimize the need for infill or avoid it altogether. This can result in a faster 3D print, better surface quality, and reduced material usage.

Testing and Validating Your Design
After following DAM principles, the success of your design can be evaluated before or after printing.
DfAM Software
Design for Manufacturing software, like DFM Pro, verifies if design rules for Additive Manufacturing are followed. The software takes the 3D part, identifies possible manufacturing issues, and suggests fixes. Automatic fixes can be applied.
FEA Software
FEA (Finite Element Analysis) software can be used to analyze the mechanical properties of your design before printing. You can alter your design using DfAM guidelines, AI, and/or dedicated software to improve the parameters within your digital 3D model.
Test Printing
Assuming that your 3D printer is calibrated and functioning properly, you can 3D print your part to evaluate the success of your design and iterate as needed. The ability to easily print tests, evaluate, redesign, and reprint is one of the great benefits of Additive Manufacturing.

Limitations of Design for Additive Manufacturing
Although designing for Additive Manufacturing has many benefits, it still has some limitations to what a specific 3D printer, material, or 3D-printing application can achieve. While DfAM guidelines can result in better 3D prints, they can not overcome inherent design flaws that may affect the overall functionality of a part.
One limitation of DfAM is human error. On one hand, expertise can greatly benefit the quality and outcome, but without the use of algorithms or AI, there is a limit to what experience can achieve, particularly in novel situations. The need to iterate designs and reprint can increase costs and delay timelines. When the time for design iteration is limited, analysis software (like DFM or FEA) and hardware (3D scanner) can reduce the likelihood of mistakes, however, these may require additional tools and software competence.
Some critics of DfAM suggest that stringent design rules result in less original or innovative designs, becoming more homogeneous in style. Others counter that the use of Additive Manufacturing opens up a world of design possibilities not achievable with other production methods.

Conclusion
The DfAM approach is a powerful set of design tools that can improve the end result of additive manufactured products and parts. DfAM is essential for efficiency and consistency when designing models for 3D printing and is particularly essential for industrial 3D printing, improving the performance of products by making them lighter and more robust.
In many cases, DfAM can also benefit aesthetic choices to result in beautiful, quality 3D prints. DfAM is an evolving set of rules and best practices, which can be modified for specific design tasks and as 3D printing technology evolves.
Want to know more? Watch this webinar to learn about industrial design for Additive Manufacturing.

INDUSTRIAL QUALITY MEETS COST EFFICIENCY.
COMPLEX PARTS IN LARGE SCALE.
The BigRep PRO is a 1 m³ powerhouse 3D printer, built to take you from prototyping to production. It provides a highly scalable solution to manufacture end-use parts, factory tooling or more with high-performance, engineering-grade materials. Compared with other manufacturing and FFF printing solutions, the PRO can produce full-scale, accurate parts faster and at lower production costs.
About the author:
