HOW TO: 3 Steps to Hide the Seams and Become Design Leader

Hiding the seams with Marco

Why is it important?

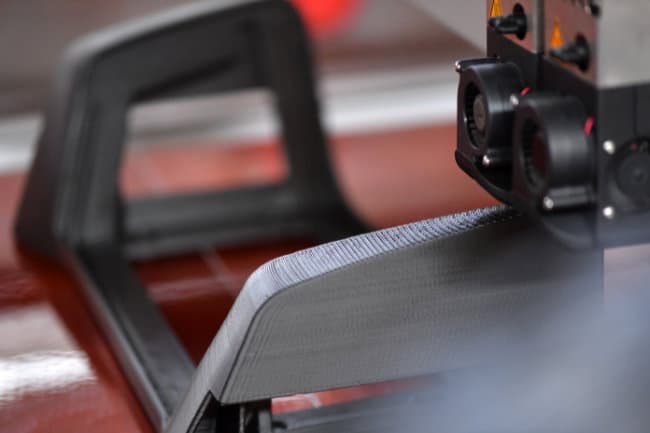
If one has a good knowledge of slicing software, they can reach a higher quality of the printed object. That naturally influences the general outlook of the one. Important aspect of the final print are the seams. They might spoil the effect of the design. The continuity of the print can be lost at start and end points of every layer. Hiding the seams is important in case of creating a prototype that is true to the final product as possible. Furthermore, it’s especially meaningful if you want to print the ready-to-use objects with important details.

In 3D models a slicing program transforms the model into G-code. The code includes any preferred optimizations and parameter changes. Thanks to that, the person printing the object has much more control of the quality and final outlook of the print. If the software is not set up properly, it automatically generates random starting points in different locations. That can affect the quality of the print. However, when the settings can be changed. It means that user can also change the whole project into one united object. That includes hiding the seams or unwanted curves.

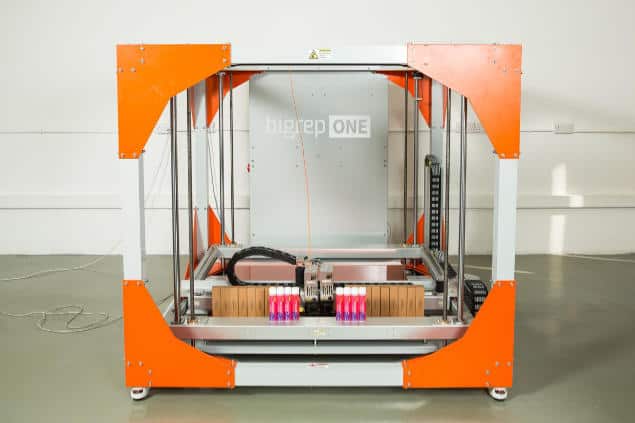
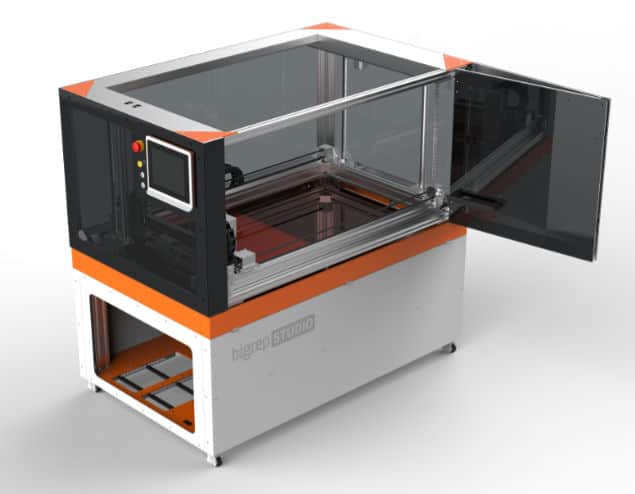
In BigRep we understand the need for the best possible finish effect of the project. That is why we try different slicing methods, to find the perfect one and apply it for the full print height. In our case it is very important due to the large-scale printable quantity.

The tutorial


Interested in BigRep's upcoming events?

Find Out More


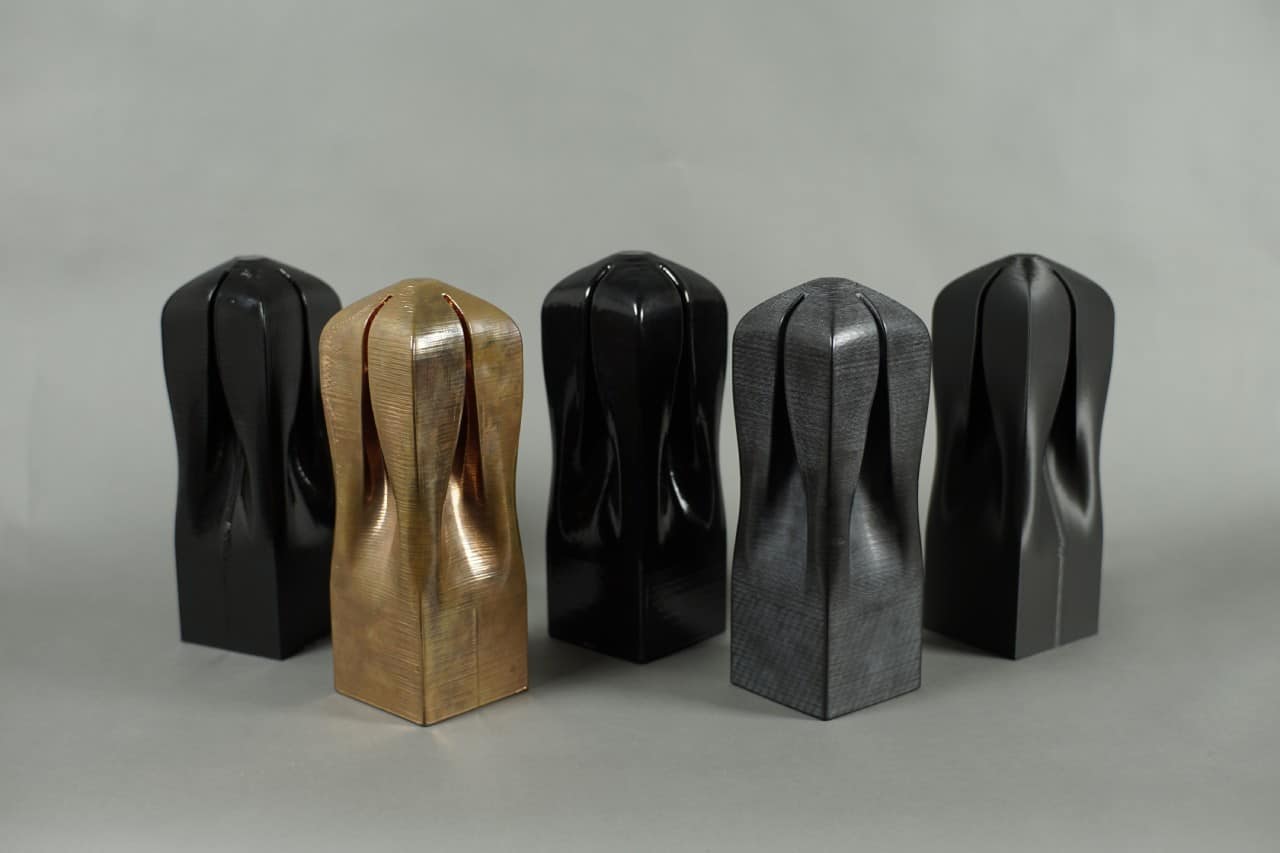
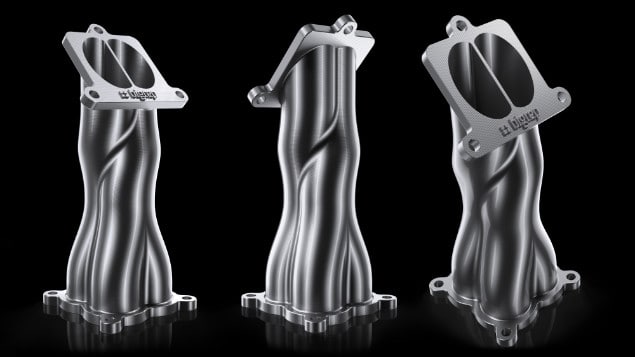
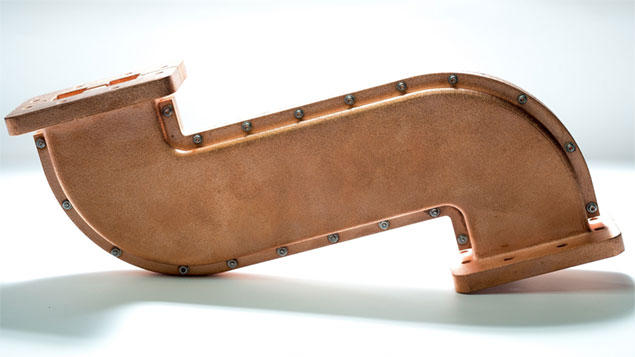
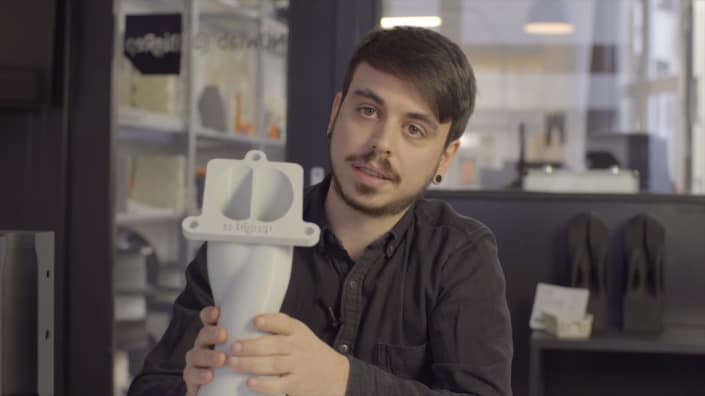
The tutorial explains how to avoid this problem and how to, using Simplify3D slicing software, step-by-step generate optimal start points. Marco Mattia Cristofori, the Architect and 3D Printing Specialist at BigRep, explains that a few additional modifications of the start and end location of the layers can make it sure that the seam is created in an optimal spot on the print. Often there is a natural groove or corner in a print that is a hiding spot for the seam. For example, on the manifold pictured and printed on Bigrep STUDIO, the curve on the right-hand side covers up the seam nicely. “We can make the seams follow the exact path we want them to follow,” said Cristofori. “So, instead, we can optimize this when we generate the G-code”.

hiding the seams

3 STEPS TO HIDE THE SEAMS

You can hide the seams on your print in 3 easy steps:

1) Import your model on Simplify3D and figure out how many processes you need to split the part in. Make sure the seams follow the path you want.

2) Edit singularly each process on the LAYER section changing the X & Y setting where the seams should be set up closer to.

3) Slice the part generating the G-code and check for possible improvements. Try different variation of the X & Y settings until you achieve the result you need.

However, Simplify3D is not the only possible tool. The list and description of popular slicing software can be found here.

DISCOVER OUR 3D PRINTERS

3D Printing Post Processing

Post Processing 3D Printed Parts

Guide to Post-Processing 3D Printed Parts: 16 Methods

Get more from your 3D prints with smoother surfaces, improved mechanical properties, enhanced aesthetics, and more.

Get an overview of 16 post-processing techniques in this guide or see some real life examples in the ebook and webinar:

Why 3D Print Post Processing Smooth Surface

SMOOTH SURFACES

Reduce the appearance of print layers and refine surfaces

Why 3D Print Post Processing Strengthen Parts

Strengthen Parts

Reinforce prints for added strength and durability

Why 3D Print Post Processing Add Functionality

ADD FUNCTIONALITY

From UV and weather resistance to conductivity and more

Why 3D Print Post Processing Aesthetic Finishing

AESTHETIC FINISHING

Transform the surface appearance for visually striking parts

All 3D prints are produced layer by layer, which results in a notched surface texture that is more pronounced with lower print resolutions. If support structures are needed for your part, it may have additional flaws on its touch points. This guide covers the first step to part finishing, support removal, and the three categories of post-processing: SubtractiveAdditive, and Material Changing.

Support Removal

Unless your print is optimized for supportless 3D printing, you’ll probably be printing with support structures. These are usually easy to snap off, but even well designed supports will leave behind imperfections where they were once attached. To smooth these areas, it is recommended to post-process the entire part by any number of methods outlined below.

With dual extrusion you can print soluble support structures that disintegrate in water and leave no trace on your part. They’re especially useful when post-processing isn’t otherwise necessary.

3D Print Post Processing Support Removal

SUBTRACTIVE

The most common post-processing category, subtractive post-processing is the act of removing material from the part surface to make it more uniform and smoother.

ADDITIVE 

Additive post-processing puts additional material directly onto printed parts. Additive techniques are highly efficient for smoothing parts while adding strength and other mechanical properties.

PROPERTY CHANGING

Neither removing nor adding material, property changing post-processing redistributes molecules of a 3D print. Smoother and stronger parts are achieved with thermal and chemical treatments.

Subtractive Post-Processing Methods

Probably the most common post-processing category, subtractive post-processing is the act of removing some of your part’s material. Usually this is in the form of sanding or polishing a part, but there are a variety of other methods that includes tumbling, milling, abrasive blasting, and chemical abrasive dipping.

Sanding & Polishing

  • DIFFICULTY 
  • SMOOTHNESS  

Both sanding and polishing techniques remove surface layers by rubbing it with an abrasive material. Sanding requires coarser grit sandpaper and sanding tools, while polishing may use finer sandpaper, steel wool, polishing paste, or cloth.

Sanding removes larger blemishes such as support remnants or print irregularities and reduces the visibility of print layers. The sanding process will leave a gritty, although more uniform surface texture, and very course sandpaper will leave surface scratches. Polishing the part after sanding will produce an even smoother surface.

Simplicity and affordability make sanding and polishing the most common methods of post-processing, but both require labor that is time consuming for larger parts and batches. These methods may not be suited for parts with hard to reach cavities.

3d-print-post-processing-sanding-polishing

Tumbling

3D Print Post Processing Tumbling
  • DIFFICULTY 
  • SMOOTHNESS 

A tumbling machine consists of a vibrating vat containing lubricating fluid and abrasive media, which are specialized stones that wear objects down according to their size, shape, and hardness as they tumble together. A 3D printed part is simply placed into the vat of tumbling abrasive media for a specific length of time. Some expertise is required to pair parts with the correct abrasive media and processing time, but when done correctly it is very effective at producing uniform finishes.

Tumbling is a largely automated subtractive method that can post-process multiple parts simultaneously, which is useful for smoothing batches of parts. Tumbling vats come in a range of sizes so larger parts can also be processed. Since the abrasive media is constantly in contact with the part, larger pieces do not require longer processing time, but only larger machines with the adequate amount of abrasive media. However, complex shapes may lose detail and sharp edges may become slightly rounded by tumbling.

Abrasive Blasting (Sand Blasting)

  • DIFFICULTY 
  • SMOOTHNESS 

Abrasive blasting, also known as sand blasting, is subtractive post-processing method where abrasive material is blasted onto 3D printed parts at high pressure. For large parts this can be done in an open environment, but smaller parts are typically processed in a containment chamber that collects and reuses the abrasive material. Like other grit-based subtractive methods, there are a range of grits available and grit must be chosen based on part geometry and desired finish. Sand is a frequently used abrasive material, but other small coarse objects such as plastic beads can be used for different results.

Since the abrasive material is smaller than that of tumbling, abrasive blasting is less effective on very rough parts or high layer heights. This method only treats surfaces reachable by the stream of blasted material, so complex geometries and cavities may not be feasible. Additionally, the blasting tool can only treat limited areas at a given time, so this method may be slower and difficult to process multiple parts simultaneously.

3d-print-post-processing-abrasive-blasting-sand-blasting

CNC Machining (Milling)

3d-print-post-processing-cnc-machining-milling
  • DIFFICULTY 
  • SMOOTHNESS 

CNC milling, also called CNC machining, is the inverse of 3D printing - it uses a computer-programmable drill moving (and sometime rotating) in three axes to carve out geometries. Like 3D printers, the technology uses a “G-Code” to program tool movements, in this case a milling bit rather than a filament extruder.

While CNC machining is considered highly accurate from 0.005” to 0.00005”, it cannot produce certain geometries and wastes material, which is often expensive. Conversely, large-format 3D printing cannot achieve the same accuracy, but can achieve much more complex geometries and wastes very little material.

It is typically not time or cost effective to mill the entire surface of a 3D print and it may be difficult to calibrate the milling tool to the print position. But while these two production methods are seemingly at odds, there are some situations where they may be used together. If a portion of a 3D printed part must be extremely smooth or accurate, that specific area can be milled. Alternately, manufacturers can save material by 3D printing a part in a rough finish before milling it to perfection.

Chemical Dipping

  • DIFFICULTY 
  • SMOOTHNESS 

Chemical dipping, also called aid dipping, is the process of submerging parts in a chemical bath that eats away the surface. The process involves caustic materials, such as lye, sodium hydroxide, or dichloromethan, and should only be done by experts in facilities with the requisite safety features. The appropriate chemical choice is entirely dependent on the material of the 3D print, as the chemical must be abrasive to the print material.

Some expertise is required to determine how long parts should remain submerged: too brief and the part will not be sufficiently smooth, too long and it could be ruined entirely. Some care should be taken to avoid air bubbles trapped inside the 3D print as they will prevent the chemical treatment of the surface. Typically the submerged part is gently moved to agitate the chemical bath and release any air bubbles.

The process is ideal for complex geometries as the chemical bath treats all surfaces of submerged parts simultaneously. However, the size of the chemical dipping container determines the limited part dimensions of treatable prints.

3D Print Post Processing Chemical Dipping Acetone

Additive Post-Processing Methods

Additive post processing puts additional material directly onto printed parts and is highly efficient for smoothing parts while adding strength and other mechanical properties. There is a wide spectrum of methods from filling to priming, coating, metal plating, and more.

Filling

  • DIFFICULTY 
  • SMOOTHNESS 

Filling is a surface treatment that uses a thick adhesive compound, typically a paste, to fill in notches like the tiny gaps between layers of a 3D print. It is commonly used as a first step before sanding or additional additive layers. A wide range of fillers from pastes to sprays are available in many materials from light spackle to 2K resins.

Paste fillers, like wood fillers or household spackle, are usually the most accessible option. They are simply spread over the part surface and can be easily smoothed with light sanding. Spray fillers are easy to apply but provide only a thin surface covering, resulting in a rougher coating. More robust, but more advanced options are resin fillers that must be cured by one of two methods: mixing with a hardener or UV exposure. Resins are available with various viscosity, cure speeds, and advanced features like UV and a high heat deflection temperature. For some UV-cured fillers leaving parts in the sun may be sufficient, but others will require a specialized UV chamber.

When using any kind of resin cover skin, wear gloves, and keep the working space well ventilated. Ensure you’re familiar with the requirements of your filler or coating before applying it to a part as this may drastically change the time or equipment required for post-processing.

villroy-boch-post-processing-filling-plaster

For some UV-cured fillers, leaving parts in the sun may be sufficient but others will require a specialized UV chamber. Ensure you’re familiar with the requirements of your filler or coating before applying it to a part as this may drastically change the time or equipment required for post-processing.

Priming

3D Print Post Processing Priming
  • DIFFICULTY 
  • SMOOTHNESS 

Primers prepare 3D-printed parts for the addition of subsequent layers by pre-treating the surface for better adhesion. They are far less viscous than fillers and may only smooth very small surface imperfections, so their main function is adhesive surface preparation. Primers are available in spray or brush form, but spray primer may produce a more even coating.

To prime a part most effectively, the imperfections and layers notches should first be reduced by other post-processing methods such as sanding or filling. Ensure that your primer is made for plastic adhesion and is suitable for additional materials you intend to apply later. Leave the primer to set for 24 hours or as otherwise directed.

Brush Coating

  • DIFFICULTY 
  • SMOOTHNESS 

Liquid coatings vary widely in material such as paint, varnish, resin, or even plastic. While there are several application methods, brush coating is the simplest way to smooth unique or small batches of 3D printed parts. Although the surface smoothness may be inconsistent due to brush strokes, choosing a material with the proper viscosity can avoid these surface irregularities.

For a robust and smooth surface apply a 2K resin, which is a two-component mixture of resin with a hardener. When combined, the mixture creates an exothermic chemical reaction that cures the resin over a given amount of time. There is a huge range of resin products for a variety of uses: laminating resins for thin surface applications, casting resins for larger volumes, fast and slow curing resins, and resins with additives (like aluminum, for example) for additional performance enhancement such as temperature, UV, or chemical resistance. To achieve the smoothest surface when brush coating, use a resin with an appropriate “self-leveling” viscosity that will even out brush strokes without material dripping off the part. There are resin products specifically formulated for 3D prints that can achieve very smooth surfaces after one coating.

When brushing other materials such as paint or varnish it may be more difficult to avoid brush strokes, but many coatings can be sanded after drying to achieve a smoother surface. It is also possible to apply an additional coating of another material, 2K resin for example, to achieve a smoother final result.

3D Print Post Processing Brush Coating

Spray Coating

spray-coating-3d-printed-statue-post-processing2
  • DIFFICULTY 
  • SMOOTHNESS 

A wide-ranging and scalable post-processing technique, spray coating a offers a number of viable methods ranging from DIY projects to robotic automation at an industrial scale. Spray coatings are available in a huge variety of materials such as paint, varnish, resin, plastics, and rubbers, just to name a few.

The simple approach for DIY projects is a spray can of a chosen material applied in a ventilated/outdoor space. Since this method typically results in minimal surface smoothing, it is recommended to sand the part first and apply several spray coats. Applying a spray primer may help the spray coating adhere to the part. Spray paint can be used for aesthetic enhancements and spray varnish can protect the surface against chipping, wear, and UV damage.

For large volume or industrial spray coating applications, a robotic arm fitted with a spraying tool head can apply a wide range of coatings to a 3D printed part. The application typically takes place in spray booth with an adequate air filter. This method allows a wider range of materials, including 2K spray coatings, primers, paints, and more, and results in higher application precision and uniformity. A robotic arm will speed up the processing time and make high-volume post-processing feasible at an industrial level.

Spray coating is most suitable for finishing large parts, rather than other additive methods such as dipping, foiling, or powder coating. The later methods all require a machine or vat that can contain the entire part, whereas spray coating is only limited by the size of the room in which it is done.

Foiling

  • DIFFICULTY 
  • SMOOTHNESS 

In foiling, or vinyl wrapping, an adhesive foil made of light metals or plastic is wrapped onto an object, often preceded by priming. Commonly known for wrapping vehicles, vinyl wrapping can also be applied to 3D-printed objects with a suitable material. Depending on the material, the foil may increase heat and stress resistance but is often applied for aesthetic enhancement like smoothing and surface quality.

The difficulty of this post-processing technique varies with the size and complexity of your part. A simple geometry, like the gently curved side panel of a vehicle, is relatively easy to foil, but complex shapes are more difficult with some being impossible to foil.

Wrapping is particularly suitable to apply detailed surface designs to 3D-printed parts. Adhesive foils come in a wide range of colors and patterns, as well as custom-printed designs. Foil can be applied by hand, stretching the material over objects to ensure no imperfections like air bubbles remain. Heat guns are often used in the process to make application easier and avoid imperfections. Vacuum foiling will automate the process for faster, precise results to ensure the material wraps around the part as perfectly as possible.

Foiling is usually not suitable for complex parts as the foil will be extremely difficult to apply uniformly and inside cavities.

3D Print Post Processing Foiling

The difficulty of vinyl wrapping varies with the size and complexity of your part. A smooth surface – like the side paneling of a vehicle – should be reasonably simple to foil but complex shapes will become exponentially more difficult.

Dip Coating

3D Print Post Processing Dipping Coating
  • DIFFICULTY 
  • SMOOTHNESS 

When dip coating, a part is submerged into a vat of material such as paint, resin, rubber, etc. and removed after a specified time, resulting in an even surface distribution. The part can be redipped multiple times for a thicker coating and smoother surface. Dipping can be used for aesthetic finishing and functional enhancement like increased strength and resistance to heat, chemicals, weather, etc.

The typical dipping process is comprised of five stages:

  1. Immersion: The 3D printed part is immersed in a vat of material at a constant speed.
  2. Start-up: The part remains submerged for a specified time for the coating to adhere.
  3. Deposition: The part is removed at a constant rate as a thin layer of the material is deposited.
  4. Drainage: Excess material will drip off of the part surface back into the vat.
  5. Evaporation: As the coating sets the solvent evaporates from the material, leaving a solid film.

Hydro dipping, also known as water transfer printing is a unique method for applying detailed designs onto a 3D print. The part is submerged in a vat of clean water that has a layer of material floating on its surface, typically a water soluble printed film or an oil based paint. As the part passes through the floating layer, the film or paint adheres to the part’s surface. The surface tension of the water ensures that the film curves around any shape. The best results are achieved with parts containing gently curving geometries.

Dip coating is suitable for complex geometries and requires some expertise in the coating material used. The size of the vat determines the dimension of treatable parts. Large prints may not be feasible, although batch processing is possible for smaller parts.

Metal Plating

  • DIFFICULTY 
  • SMOOTHNESS 

Metal plating is a chemical process where a layer of metal is bonded to a 3D printed part. It is a highly effective method to create 3D printed objects with high resistance to heat, impact, weather, and chemicals, or to create conductive parts.

The first step in metal coating plastic parts is "electroless plating" which metalizes the surface of the print, priming it for proper metal plating. This process ranges from special metal paints that are simply brushed or sprayed onto the part to industrial processes involving numerous steps of cleaning, etching, neutralizing, activating, etc. Typically, this first layer is copper or nickel, although silver and gold layers are also possible.

In the second step in metal plating, the metalized 3D print is submerged in a bath for a specific length of time to deposit a wide range of metals like tin, platinum, palladium, rhodium, and even chrome. In electroplating, the part is placed in a galvanic bath that deposits a thin metal layer from 1 - 50 microns thick. Anode and cathode ions pass through the liquid and adhere to parts in microscopically fine layers. Additional metal plating processes can build up the metallic surface thickness or deposit a different metal material.

When using a metal-acid solution, parts are submerged in the liquid solution for a specific duration, depending on the desired plating thickness. A chemical reaction attracts and adheres the metal ions to the surface of the part. Once removed from the bath, the part can receive a protective coating to prevent oxidation, corrosion, or tarnishing. Heat treatments may be used to strengthen the metal layer adhesion and prevent brittleness.

Metal plating typically works well for complex parts and can produce a range of surface qualities, smoothness, and mechanical enhancements. However, the process requires many stages and expertise.

3D Print Post Processing Metal Plating

Powder Coating

3D Print Post Processing Powder Coating
  • DIFFICULTY 
  • SMOOTHNESS 

With powder coating, also known as rotational sintering, a part is heated and rotated within a cloud of powdered plastic. As the powder compound meets the heated part, it is melted to the surface to produce a fine coating. Due to surface tension while spinning, the adhered powder produces a homogeneous, non-porous layer about 400-microns thick. The surface is typically not glossy smooth, but rather has a fine matte texture caused by the plastic cloud particle size, typically 2-50 microns.

Powder coating is a common method for protecting large metal components, but it is difficult to achieve with 3D prints. In traditional powder coating, the metal parts experience temperatures up to 200 °C, but the lower temperature resistance of most 3D printed plastics greatly limits the use of a post-processingsing method. When possible, powder coating is highly efficient for batch production with uniform surfaces, although cavities may be difficult to post-process.

Property Changing Post-Processing Methods

Neither removing nor adding material, property changing post-processing redistributes molecules of a 3D print. Smoother and stronger parts are achieved with thermal and chemical treatments.

Local Melting

  • DIFFICULTY 
  • SMOOTHNESS 

Local melting is an easy way to reduce the appearance of surface scratches from damage, support removal, or abrasive post-processing like sanding. Rough surfaces are particularly visible on dark-colored 3D prints, which appear to be a white-ish color. Using a heat gun set to high heat, quickly pass hot air over the area requiring treatment, keeping the heat gun 10-20 cm away from the part. Within seconds, the surface will melt to resemble the original print surface quality. A heat gun can also remove strings from travel moves during printing. Using the same method as described above will melt and shrink the strings. If the strings are large, small remnants may cling to the part but are often easily removed by brushing or clipping them off.

This method is not suitable for deep scratches as it is only effective for light surface roughness. It also can easily deform the part, so take care to limit the time an area is heated. The best results are achieved by sweeping hot air across the surface for several seconds. Local melting is not recommended for overall surface smoothing, but for the easy and effective smoothing of small defects and scratches.

3D Print Post Processing Local Melting

Annealing

3D Print Post Processing Annealing
  • DIFFICULTY 
  • SMOOTHNESS 

Annealing is the process of heating a print to re-organize its molecular structure, resulting in stronger parts that are less prone to warping.  Untreated 3D prints have an amorphous molecular structure, meaning that the molecules are unorganized and weaker. Being a poor heat conductor, the extruded plastic cools quickly and unevenly during the printing process causing internal stresses, particularly between print layers. These stress points are most prone to breakage.

To strengthen the part at its molecular level, it is heated to its glass transition temperature, but below its melting point. Achieving the glass transition temperature allows the molecules to redistribute into a semi-crystalline structure without melting the part to the point of deforming. Glass transition and melting temperatures vary between materials and some expertise is required to heat parts to the correct temperature for the proper length of time. 3D prints will shrink during the annealing process, which can be corrected by increasing the original printing dimensions accordingly.

Vapor Smoothing

  • DIFFICULTY 
  • SMOOTHNESS 

Vapor smoothing is the chemical process of smoothing 3D prints in which parts are exposed to vaporized solvents in an enclosed chamber. Similarly to chemical dipping, the correct solvent must be used in correspondence with the 3D print material. The cloud of solvent dissolves the surface of the print, while its surface tension redistributes the dissolved material, resulting in a smoother finish. Unlike chemical dipping, no material is actually removed from the part.

Solvents can either be heated to a gaseous state or vaporized by ultrasonic misting. The 3D print is exposed to the vaporized solvents for a specific length of time: too short and the part is not adequately smoothed, too long and the part can deform and become brittle. Most suitable solvents are caustic and combustible, and therefore require extreme levels of caution, adequate chemical containment, and disposal, and should only be handled by qualified persons.

Many vapor smoothing machines are available for use with a variety of solvents suitable for different print materials. These machines make the process automated and much safer, but most can only treat smaller parts due to the chamber's limited dimensions.

3D Print Post Processing Vapor Smoothing

Post-Processing eBook

For real life industrial examples, download our free eBook Post-Processing for FFF Prints and see this webinar about post-processing techniques.

The eBook explores the three types of FFF post-processing techniques: 1) Material Removal, 2) Material Addition and 3) Material Property Change. Also, learn more about how various techniques like high resolution tumbling, resin coating and aluminum plating are transforming 3D printed parts.

3d Printing Post Processing FAQs

Large-Scale Hybrid Parts in Automotive

Three views of a complex exhaust manifold as 3D printed prototypes

The Automotive industry continues its ongoing race to find ways to accelerate the process of designing and developing new and better vehicles. If we examine a modern car design closely, we see that it contains around 30,000 components, of different sizes and materials, manufactured using a range of techniques. Introducing 3D printing into the process of designing a machine with this number and diversity of parts can make that process of moving from new concept to marketable product much more efficient.

When it comes to the functional testing of large automotive components, any vehicle manufacturer will be happy to have the capacity to produce prototypes with realistic mechanical properties at low cost, and with few limitations on design. The combination of large-scale 3D printing with metal plating is a powerful production solution which can deliver automotive firms this prototyping capacity.

Software render of a complex exhaust manifold design
Rendering of a complex exhaust manifold design

The Manifold

The exhaust manifold plays a leading role in a car or larger vehicle’s exhaust system.
It connects to each exhaust port on the engine's cylinder head and funnels the hot exhaust down to a single exhaust pipe. Manifolds are manufactured by metal casting and have to withstand a high-temperature environment around the engine. Finding a fast, cost-effective way to perform basic fit-form-functional manifold testing can help reduce costs and shorten the product development process.

The Hybrid Concept

As part of the mutual research BigRep and Polymertal are conducting into possible applications for large-scale 3D printing and metal plating, a large manifold was printed to which was then added a thin layer of nickel in a metal plating process. The goal was to significantly improve the mechanical properties of the prototype, bringing them closer to those of a finished, cast metal part.

Exhaust manifold: software render, 3D-printed polymer, and finished nickel-plated part
Render, polymer 3D printed, and metal-plated versions of a simple exhaust manifold

Printing data

  • Printed on the BigRep STUDIO
  • Material - PLA/PRO-HT
  • Printing Time - 15 h
  • Layer thickness - 0.3 mm
  • Nozzle - 0.6 mm
  • Material weight - 450 g
  • Material cost - under 20 Euros

Plating Data

  • Technique - Direct Metalization plating
  • Material - Nickel
  • Plating thickness - 20 microns
Inlet and outlet views of an exhaust manifold
This exhaust manifold has four entry points and two outlets

Benefits of Plating

  • Increased heat deflection temperature
  • Increased chemical resistance
  • Increased part strength

The Result

The new manifold was manufactured quickly and at very low cost. The BigRep STUDIO delivered a precision-print of the design, the plating process improved the part’s mechanical properties making it suitable for real functional testing. The fast process and quality of the part suggest this method can be used for improved and accelerated testing of new automotive component designs. The result is increased confidence that 3D printing, and hybrid parts in particular, can give automotive firms who adopt the technology a lead over their competitors in bringing innovative vehicle designs to market.

Gil-Lavi-115x115

With over 22 years in the printing industry, Gil Lavi is a Sr. 3D-Printing Specialist with vast experience in implementing diverse 3D-printing technologies in design and manufacturing processes.

Connect with Gil on Linkedin HERE.

Stick by your print bed

One key challenge presented by 3D printing, especially if there is a small area of contact for a large print, is detachment from the print bed. Add to that the fact that each material requires different printing conditions. So, even on a large 3D printer like the BigRep ONE, which works equally well for all materials, our printing experts were always on the hunt for a first-layer adhesive solution that was solvent-free and environmentally friendly, not to mention easy to work with.

BigRep and R&D startup Thought3D (based in Valletta, Malta) recently announced a cooperation to bring a first-layer adhesive to large-scale build area FFF industrial 3D printers. So, we’re pleased to introduce Magigoo – a glue stick that increases printing reliability and maintenance convenience.

magigoo-2-web

What began as a meeting and casual chat between some BigRep and Thought3D staff at IDTechEx in May, ended up in a cooperation to refine the Thought3D product and make it available for testing on large-scale prints at the BigRep Berlin office. Crucial to BigRep in using the adhesive has been the fact that it sticks and holds fast to the object when the print bed is hot, and releases when the print bed is cold.

“BigRep customers expect high-quality end products," said Moshe Aknin, Chief Technology Officer at BigRep. “Magigoo is a reliable product that helps our dependable workhorse printers to achieve great large-scale results.”

In one particular instance, BigRep was printing a section of its creative team’s bionic propeller design on The ONE printer. Given the propeller model’s area of contact was rather small, the BigRep team needed Magigoo on the print bed to aid in printing the large part’s challenging geometry. Moreover, the object’s overhangs and sharp details could have led to object detachment, but with the Magigoo adhesive, BigRep was able to successfully print several sections of the model for prototyping.

magigoo-3-web

“We enjoyed working with BigRep to extend our product range for large format 3D printers and we are glad to provide a product that meets the high demands of industrial clients,” said Dr Keith M Azzopardi, Co-Founder and R&D Lead at Thought3D. “We hope to continue this collaboration with BigRep. Magigoo’s development road map is underway. We are expanding our product portfolio to include an even wider spectrum of smart adhesives targeting engineering materials.”

You can read more about the Magigoo’s glue stick on their website, or on 3Dprint.com and 3D Printing Media Network, where the announcement was also covered.

Will Metal Plating Unlock New Industrial Applications for Large-Scale 3D Printing?

After metal plating, the same Plastic 3D Printed Part has a number of improved properties.

When thinking about how large-scale 3D printer technology can add value to industrial design and manufacturing processes, there are two main technologies to consider – additive manufacturing with advanced polymers, and metal 3D printer technology. In both cases, the new technology by replacing a traditional manufacturing method digitizes the process and because of that saves time, reduces costs and increases design freedom.

In recent years, more engineering-grade materials have become available for use with plastic 3D printers and these offer a good solution for metal replacement applications, including for end-use parts. But what if you could combine the advantages of plastic and metal together in one solution? That is where metal plating of large 3D printed plastic parts comes in.

WHAT IS METAL PLATING?

Metal plating is a method of depositing a thin layer of metal, usually Copper or Nickel, on an object made of a different material. This is done in order to improve one or more of the object’s properties, for example strength; thermal or electrical conductivity; chemical resistance or heat deflection temperature. The result – a hybrid product and a new set of potential solutions for metal replacement applications.

Before and After Shots of a 3D Printed Component plated in Copper. Metal printing

Our experts with +25,000 hours of experience in industrial 3D printing are waiting to sink their teeth into your unique and challenging use case.

APPLICATIONS FOR METAL-PLATING

Metal-plating could enable the introduction of cost-effective hybrid products in heavy industries such as Defense, Electronics & Medical Devices. We can imagine products with the following properties provided by the metal layer:

  • EMI/RFI Shielding
  • Electrical Conductivity (Plastic antennas, Wave-Guide)
  • Barrier Characteristics (offering protection from humidity, chemicals, fumes…)
  • Enhancing Mechanical Properties – over the original plastic parta design flexibility
  • ESD Protection
Before and After Shots of a 3D Printed Component plated in Copper
3D printed component before and after copper plating

ADVANTAGES OF METAL PLATING OF LARGE 3D PRINTED PARTS

Over the past few years a range of 3D printed parts have been successfully metal-plated. Mostly these have been small and medium-sized parts. What would be the advantages of plating large 3D printed parts?

One of the barriers of producing large parts, in prototyping or end-use manufacture, is production cost. BigRep 3D printers allow one to affordably print large parts, up to 1 cubic meter in size. Adding a metal-plating option for such prints gives us a new way to produce large hybrid products which is suitable for advanced applications and at the same time implies cost reductions over solid metal production.

TESTING LARGE-SCALE METAL-PLATED PARTS

Currently BigRep and Polymertal - a global leader in metal plating solutions - together with a large Israeli defense company, are testing a unique large metal-plated part which was printed on a BigRep ONE. Up to now this part has been manufactured out of aluminum in a manual short-series production process.

In the coming weeks the 3D-printed version of this end-use part will be assembled and tested on an Unmanned Aerial Vehicle. Success in testing would mean the defense company has a new option of preforming a fully functional test of such parts which allows for faster design and testing cycles before moving on with manufacturing.

When the companies share their test results, expected in around a month, we will also have a better indication of just how big the potential is for metal-plated 3D-printed parts to replace traditionally made large metal parts.

Learn more about modeling, building and testing custom products fast and cost-efficiently.

Gil-Lavi-115x115

With over 22 years in the printing industry, Gil Lavi is a Sr. 3D-Printing Specialist with vast experience in implementing diverse 3D-printing technologies in design and manufacturing processes.

Connect with Gil on Linkedin HERE.

Reflections on 2017 – BigRep’s emerging global position in the Industrial Additive Manufacturing space – MADE IN GERMANY!

BigRep STUDIO, compact industrial 3D printer

BigRep’s 3rd full year in business has been one of big strides forward across the board. From doubling sales, to exciting new products and collaborations, to increasing confidence about the position we have carved out for ourselves in a fast-growing 3D printing industry, it has been a great 2017.

The backbone of our business is our resource base and in this respect, we have seen significant changes. We were pleased to announce key new investments this year from Klöckner & Co and Körber. We also made some important appointments, including those of Moshe Aknin and Frank Marangell who each have CVs bulging with world-class 3D printing industry experience.

As President of BigRep America, Frank Marangell’s arrival signalled the opening of our US office. We have wasted no time in developing a strong US team and our engagement with this crucial market kicked off with a presence at signature additive manufacturing shows AMUG in Chicago and Rapid + TCT in Pittsburgh. In a similar vein, this year we continued to grow our network of resellers, so that we can now say BigRep is a company with a global reach to match our technological ambition.

3D PRINTERS, FILAMENTS & NOWLAB: AN INCREASINGLY CUSTOMIZED 3D PRINTING PACKAGE

The development of that underpinning technology continues apace. This year we have been busily shipping our new BigRep STUDIO machines, as well as introducing new specialist 3D printer filaments and 3D printer software solutions. But we do not just sell machines and materials. The value we can add through hands-on work with clients to tackle big additive manufacturing challenges in their specific use cases became very clear this year. Our research and innovation hub NOWlab drives this work forward. NOWlab is playing a central role in our ground-breaking end-use parts manufacturing project with Deutsche Bahn, as well as numerous projects in other industries.

BigRep’s experts are waiting to sink their teeth into your unique and challenging use case.

Click here for more Info


The above activities are all part of BigRep’s maturation into a company with a clear and valuable role in the 3D printing industry. That transition requires that we work to our strengths and find industry-leading strategic partners with whom to work. For this reason, our production agreement with long-established German industrial firm Heidelberger Druckmaschinen AG was an important piece of groundwork in establishing BigRep.

C-level-BigRep-web

GROWING INTEREST IN INNOVATIVE ADDITIVE MANUFACTURING PROJECTS

So, it has been a year of great progress for BigRep, in three key areas: the basic infrastructure to build industrial machines; our 3D printing product and service package and developing industry track record; and our growing strategic connections for the future. These developments have delivered us greater exposure and interest from a range of stakeholders and at different cross-industry events. The August visit to BigRep’s offices by Ramona Pop of the German Green Party was just one of many from potential clients and a wider audience enthused by industry 4.0. I was pleased to share a platform at bitkom’s September 3D Printing Summit with colleagues from Braunschweig University of Art and Audi to talk about our fantastic car seat project. Our work with Deutsche Bahn has created a buzz and led to my appearance with Managing Director of ‘Mobility goes Additive’ Stefanie Brickwede at CREATING URBAN TECH in October.

November’s formnext show, the high point in the year for the additive manufacturing industry, was our opportunity to assess how far we’ve come in 2017 and to further shape our vision for the future. The message I took from a supremely busy four days engaging with colleagues across industry is that we are moving in the right direction with our technology, with our research-oriented and tailored approach to clients, and with our strategic plan to build machines for industrial users. Looking forward to 2018, our mission will be to push ahead on these core aspects of our work. Our headline task within this is to apply BigRep’s 3D printing technology and NOWlab’s ingenuity to a new round of even more impressive end-use applications. For that we need professional clients willing to think big and trust in the research processes necessary to realize further breakthroughs in additive manufacturing technology.

René

René is the founder and CEO of BigRep GmbH, driving it to be one of the world-leading 3D printing companies, with his many years of experience in business development and innovative technologies.

Connect with René on Linkedin HERE.

Global industries are boarding the additive manufacturing train – in Berlin!

Deutsche Bahn 3D printed part

To say we’ve been focused on tapping new potential this year would be an understatement. Front of mind for BigRep has been work on exciting projects and partnerships to discover new end-use manufacturing applications for our advanced large-scale 3D printer technology.

In late October I had the pleasure of sharing a podium with Deutsche Bahn’s (DB) Stefanie Brickwede at the dynamic CREATING URBAN TECH conference in Berlin, to discuss the successful cooperation between BigRep and DB. We spoke on this again at formnext on 14th November in Frankfurt. BigRep is a member of Mobility goes Additive, a network which DB initiated to develop additive manufacturing solutions for the logistics and mobility sectors. We have been working together to explore how DB can use BigRep’s additive manufacturing technologies to further their business and improve efficiency.

DB and additive manufacturing
BigRep CEO René Gurka & Deutsche Bahn’s Stefanie Brickwede at CREATING URBAN TECH

We can highlight three key outcomes of the partnership to date. All three are typical of the benefits industrial organisations encounter when utilizing our technology.

Firstly, Deutsche Bahn has identified that 10-15% of their demand for spare parts could be met with 3D prints. This approach can reduce production time and costs, and facilitate a dramatic reduction in necessary spare parts inventory. They expect to 3D print an impressive 15,000 spare parts in 2018.

Secondly, they are finding potential to use additive manufacturing to develop new kinds of end-use products. This article describes one example, a new design for a printed part with braille on its surface.

Finally, DB believes that the development of new 3D printer materials will be the key to determining how much end-use manufacturing it can do in future with 3D printing technology.

This joint project we have with Deutsche Bahn illustrates the new value that comes when companies invest together in exploring how new techniques can be applied to existing and upcoming design challenges. It, as well as developments within Mobility goes Additive, also shows that Berlin is becoming a hub for innovative developments in the emerging additive manufacturing sector.

But the story, and especially that final point, also illustrates that we have choices to make. We have the option to pursue networking opportunities in this technology to their limits and develop the next generation of high value technologies. Or, if we pursue these opportunities less aggressively, other firms and other cities will get there first and reap the rewards.

additive manufacturing - 3d printing filament
Developing new 3D printer materials is a core aspect of BigRep’s development of new additive manufacturing applications

We are conscious of this choice when it comes to Deutsche Bahn and Mobility goes Additive, and will seek to sustain our close working relationship to develop new 3D printer materials, hardware and techniques to fully explore the potential for this cooperation. What I discussed at CREATING URBAN TECH, as well as at formnext in Frankfurt (on 14th November), is that we need to apply the same thinking to Berlin and its own potential in terms of additive manufacturing. I believe that to take ourselves from a promising hub to that central, world-leading position, we should formally nurture networking activities between businesses and other research organisations in the sector, for example, with a Centre of Excellence in Additive Manufacturing in Berlin. Can we 3D print that?

Learn more about modeling, building and testing custom products fast and cost-efficiently

René

René is the founder and CEO of BigRep GmbH, driving it to be one of the world-leading 3D printing companies, with his many years of experience in business development and innovative technologies.

Connect with René on Linkedin HERE.

Formnext 2017: what prospects for the industrial 3D printer sector?

Representatives from across industry meeting at the BigRep stand at Formnext 2017

Formnext 2017 was another great event for industrial 3D printer enthusiasts. More companies have joined the race to bring 3D print technology to maturity and we saw plenty of new products on offer. Overall, a clear message came across – that additive manufacturing is here to stay and will continue to dramatically change the way we design and manufacture products.

Before discussing which technology and/or company is most likely to lead the industrial 3D printer market in coming years, we will investigate two key areas – 3D print solutions for prototyping and for manufacturing.

3D PRINTERS FOR PROTOTYPES

Within this segment of the market affordable 3D printers for plastic prototyping are making headway. These are not necessarily cheap 3D printers, but machines which strike a lower-cost balance between functionality and price. In the past such machines had few features and competed mainly on price. At Formnext 2017 we saw more sophisticated machines which can be used for specific applications such as dental and other fit-form-function applications. This means that higher-cost machines dedicated to prototyping must offer unique features to be attractive. BigRep offers industry exactly this kind of added-value through its large-scale industrial 3D printers and growing range of specialist 3D printer filaments.

BigRep ONE 3d Printed Furniture Prototype at Formnext 2017
BigRep ONE 3D-printed furniture rapid prototype: large-scale & weight-bearing

3D PRINTERS FOR MANUFACTURING

3D printing for manufacturing can be divided into two areas – plastic and metal 3D printing. With plastic, advanced polymers can replace metal for certain applications in Medical, Aerospace and other industries. In such cases if superior mechanical properties and/or larger parts can be delivered we have a more attractive solution. If printing speeds increase, plastic 3D printing could also potentially replace injection molding in some manufacturing applications.

The second manufacturing area, metal 3D printing made a big splash at Formnext 2017. On the one hand the prices of some lower-spec machines seem to be falling, making metal 3D printers more accessible. At the same time, new heavy metal printers are aiming to deepen the automation and integration of 3D printing in manufacturing processes with a focus on quality, variety of materials and printing speed.

End-use spare parts produced for Deustche Bahn on display at Formnext 2017
At Formnext 2017 BigRep showcased end-use spare parts produced for Deustche Bahn

LOOKING FORWARD – WHAT WILL BE THE NAME OF THE INDUSTRIAL 3D PRINTER GAME?

If we look at it from the industrial user’s side, before purchasing a 3D printer the following elements are usually considered:

  • The company behind the product – is it a short or long-term player?
  • Quality, accuracy & repeatability – the basics of effective additive manufacturing
  • Reliability & ease of use – for minimum hassle
  • Variety of materials - for a wide range of applications
  • ECO system - inclusion of a dedicated Software solution. This is particularly critical in the metal printing space
  • Printing speed – this must increase to increase productivity, especially in manufacturing
  • Reasonable cost per value – an essential requirement of the end user
Exploring with industry how 3D printing can bring it new value and competitive advantage

SO WHICH COMPANY AND/OR TECHNOLOGY HAS THE POTENTIAL TO LEAD THIS INDUSTRY?

It depends on how you measure it, but no doubt a strong combination of a ‘new generation’ technology with a focus on printing speed and advanced materials, plentiful long-term funding, and a winning business strategy will be key success factors for any 3D printer company. Above all one factor will be most important – the people behind the company. Without a professional, experienced, and totally dedicated team driving it forward, any new amazing technology cannot make it. At Formnext 2018 we will see who and which technologies are making the best progress.

All parts below were printed with BigRep Large Scale 3D-Printing Technology

Gil-Lavi-115x115

With over 22 years in the printing industry, Gil Lavi is a Sr. 3D-Printing Specialist with vast experience in implementing diverse 3D-printing technologies in design and manufacturing processes.

Connect with Gil on Linkedin HERE.

Cutting up to 80% off Large Metal Part Production Time: Sand Casting Using Large-Scale 3D-Printing Solutions

Sand Casting

In our first two articles about large-scale 3D printing applications we covered Fit-Form-Function and Molds & Tooling. This time we will examine the benefits of integrating 3D printing into the Sand Casting process.

What is Sand Casting?

Sand Molded Casting, also known as Metal Casting, is a process by which a special mold from sand is created to form metal objects at very high temperatures. The technique is widely applied in heavy industries such as Aerospace, Automotive, Railway and Shipping as a solution for short-run production. Here’s how it works:

flow-chart

The Sand Casting Process

Sand Casting is a relatively simple process enabling manufacturers to produce metal objects. However, there are several challenges involved, including:

  • High costs
  • Manual labor required
  • Lengthy process duration
  • High margins of error
  • Limitations in producing complicated patterns

How can large-scale 3D printing help?

Traditionally, the replica is made manually using different materials types and techniques. The process is not 'digital’, meaning it takes longer to complete and can result in accuracy issues.
Integrating large-scale 3D printing into a sand casting process offers the following benefits, as compared to a standard sand casting process:

  • Reducing replica and pattern production time
  • Creating a highly accurate replica from a digital file
  • Significantly lowering costs
  • Replica design flexibility

These advantages are even greater when the pattern-making process is done in-house instead of being outsourced. Production time can be reduced by up to 80%, once the process is fully managed and controlled internally.

Learn more about modeling, building and testing custom products fast and cost-efficiently.

Gil-Lavi-115x115

With over 22 years in the printing industry, Gil Lavi is a Sr. 3D-Printing Specialist with vast experience in implementing diverse 3D-printing technologies in design and manufacturing processes.

Connect with Gil on Linkedin HERE.

Advanced Applications: Molds & Tooling – Large Scale 3D Printing

In the last article we discussed the use of large-scale 3d printing in design and concept modeling processes. It is now time to examine more advanced applications. As heavy industries look for ways to save costs by implementing 3D-Printing in short run production/manufacturing, we turn to the question of whether and how large-scale 3dp solutions can face this challenge.

"But large-scale FDM 3d-printing is not there yet," you might say. "How can one use this technology to produce end use parts?" Well, not only is it possible, but it also has the potential to solve unique challenges manufacturers are facing today with production of large objects.

All parts below were printed with the BigRep Large Scale 3D-Printing Technology

MOLDS AND PRODUCTION TOOLING

3d-printing provides developers and manufacturers with an efficient way to produce one or several custom design products. In the following example, a large mold was printed and was used as a lay-up tool for a composite structure to produce the final part. Here's an overview of the process:

Mold1

Step 1 – Printing a large-scale mold

Mold2

Step 2 – Coating & post-processing

Mold3-2

Step 3 – Carbon fiber sheet coating

Mold4

Step 4 – Resin injection (vacuum infusion)

Initial production was completed with injection of the resin into the mold. After post-processing and finishing it was installed on a racing car as a fully functional end use part:

Race-Car-BigRep-1

THE BENEFITS

  • Achieving higher accuracy compared to non-3D printing methods when working with wood and foam
  • Drastically shortening the production time of an end-use part
  • Making considerable cost savings compared with producing the same part with a CNC machine.

ANOTHER GREAT EXAMPLE

A fabricated forming mold to produce a new bus lighting panel design, using a similar process:

BusTech1

Step 1 – Printing a large-scale mold

BusTech2

Step 2 – Producing the end use part

THE BENEFITS

  • Shortening production time by 50% compared to working with CNC
  • Costs lower than they would be using alternative techniques or other more expensive 3D printing technologies

Learn more about modeling, building and testing custom products fast and cost-efficiently.

Cookie Consent with Real Cookie Banner